Working with journeys
The expected state and how to read a diff
Every scan replays the recorded journey, and the scanner writes down what each step sent to the dataLayer and to analytics tools. On its own that tells you little. It becomes useful once there is something to compare against. That yardstick is the expected state: a record of which events and parameters each step should send.
This guide explains how the expected state is built, what is compared against it and what is not, and what the buttons next to a change actually do.
How the expected state is built
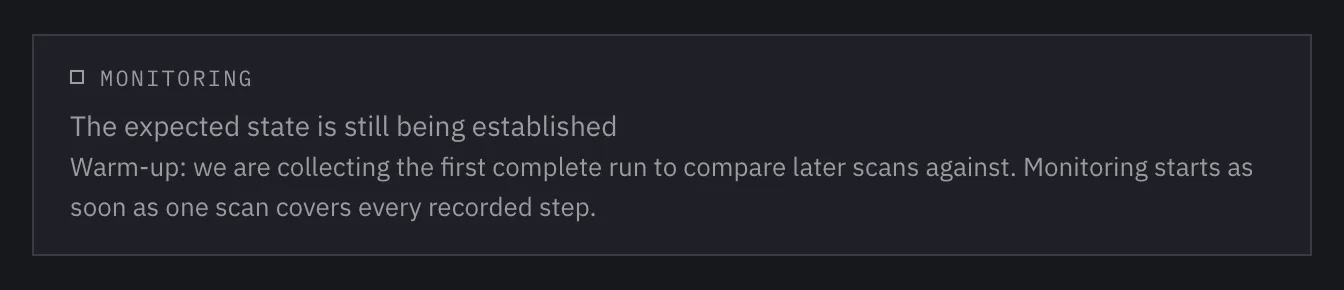
You do not write the expected state by hand. It is taken from the first scan that can be trusted. Until such a scan arrives, the journey is in its warm-up and the test detail shows this notice:
A scan can establish the expected state when it:
- ended with the status “Completed”,
- covered every recorded step, with none of them failing or skipped,
- ended every step on the recorded page and not somewhere else,
- found every target through your recording, meaning the recorded selector or a fallback selector, and not by text, by coordinates or by a substitute element the replay inferred on its own,
- had no fix proposal waiting for any of its steps,
- measured at least some analytics events on at least half of the steps.
The expected state is written from the first such scan exactly as it was measured. That scan reports no changes itself, because it becomes the yardstick. Comparison starts with the next scan.
If several scans in a row fail these conditions, the notice changes to “Monitoring is not running for this journey” and says what needs doing. Usually that means re-recording the journey or finding out why the replay does not reach the end.
What is compared
For every step the scanner compares three things: whether the same events arrived, whether they carry the same parameters, and whether each parameter has the same JavaScript type (string, number, boolean, array, object). Nested objects are compared field by field, for example ecommerce.items[].price.
Values are not compared. A journey may well add a different product to the cart on every run, so item_id and price change, and that is fine. A change from 1290 to 990 is therefore not reported. When value arrives as the string "990" instead of a number, though, that is a type change.
Two details. An empty value (null, undefined, an empty string) does not count as a type, so a move into or out of it is not reported. And in requests to tool servers, the scanner leaves out parameters that change on every page load, such as timestamps or random identifiers. From dataLayer pushes it leaves out only Google Tag Manager's own events and keys (gtm.*) and pushes without an event name, such as consent or configuration calls.
The exception: consent values
For consent, the value is what matters. The scanner reads the Google Consent Mode signals (adStorage, analyticsStorage, adUserData, adPersonalization) from the gcs and gcd parameters that Google tags send, and compares them with the expected state. When a step that had granted now shows denied (or the other way round), the scan reports it as “Consent changed”.
Expected consent values are kept separately for each country a scan runs from. When you scan from a new country, the first usable scan from there only records its consent values. If the scanner cannot read a value, it reports “Consent unreadable”. That is a measurement failure, not a fault on your site.
Which changes a scan reports
| In the dashboard | API value |
|---|---|
| Event removed | missing_event |
| Event added | extra_event |
| Param removed | missing_param |
| Param added | extra_param |
| Type changed | param_type_changed |
| Event drifted | event_drifted |
| Consent changed | consent_value_changed |
| Consent unreadable | consent_unreadable |
| Step not verified | step_not_reached |
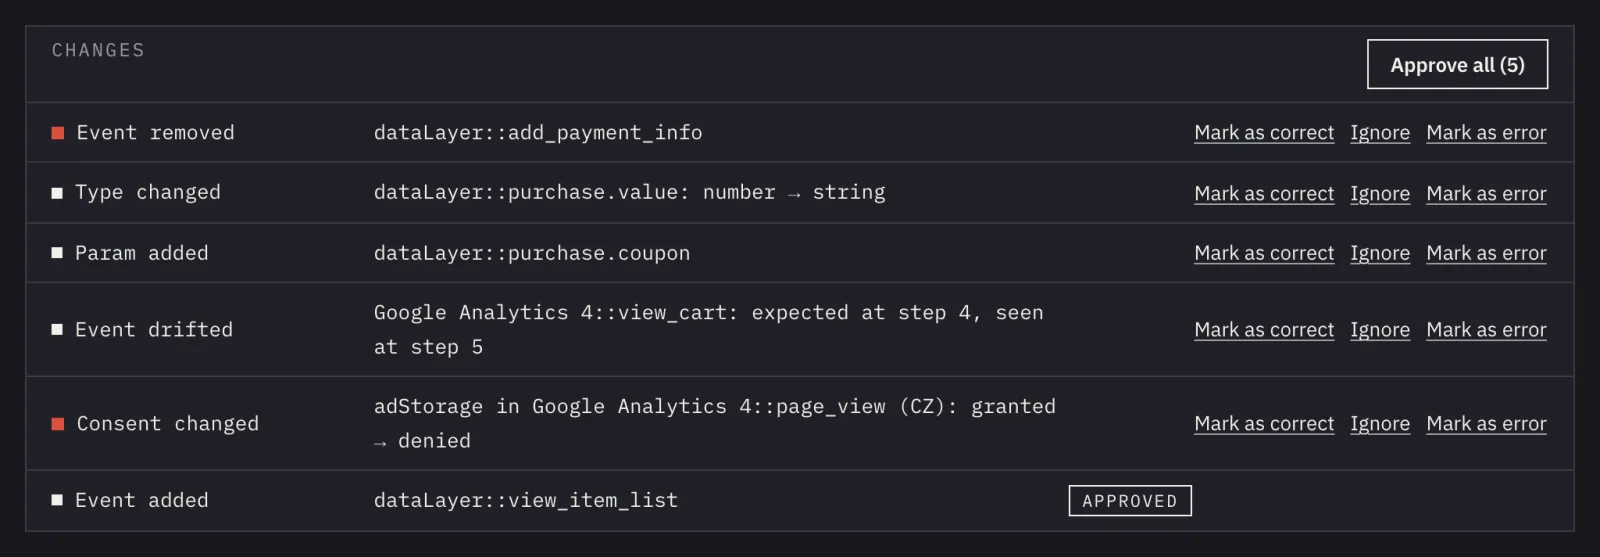
Only two types are marked in red: “Event removed” and “Consent changed”. In both, the site stopped doing what the expected state says it does. The other changes are warnings for you to judge. “Param added” is information only. “Step not verified” and “Consent unreadable” mean we could not measure, and they say nothing about your site.
Drift by one step and required events
An event belongs to the step during which it arrived. A slow tag therefore sometimes fires only in the next step. So that this does not turn into a “removed” plus “added” pair, a tolerance of ±1 step applies. An event that arrived one step away is reported as “Event drifted”.
The tolerance does not apply to the required events purchase, begin_checkout, add_payment_info, consent_update, consent_default. When the site's own tagging (dataLayer, Google Analytics 4, Google Tag Manager) does not send one in its step, the scan reports it as “Event removed”, not as drifted. Events with the same name that other tools send on their own are not covered by this rule.
When a step does not complete during the replay, the events missing from it are not held against the site. Instead the scan shows one “Step not verified” row.
Which vendors are monitored
Changes are reported only for monitored vendors. By default these are dataLayer, Google Analytics 4 and Adobe Analytics. You switch on others in “Monitored vendors”, where a newly detected vendor appears under “Newly detected — decide”. The dataLayer is always monitored.
What the buttons next to a change do
- “Mark as correct” writes the change into the expected state. A missing or extra event or parameter is written as optional: neither its presence nor its absence is reported again, but its type is still checked whenever it appears. A type change writes the new type, a consent change the new value, and a drifted event is moved to the step where it appeared. “Approve all” does the same for every pending change, in a step's changes panel for that step and in the scan's toolbar for the whole scan.
- “Ignore” stops reporting the change. Ignoring a whole event also covers its future parameters.
- “Mark as error” keeps the change as a “Known regression” until a later scan no longer finds it.
Why a person must review the first expected state
The expected state is written from the first usable scan exactly as that scan measured it. The scanner does not know what your tagging should look like. It only knows what it looked like then. If the site was already sending value as a string at that point, the order confirmation had no purchase, or a consent signal was granted earlier than it should be, that becomes the expected state. Later scans then report only departures from the bug, not the bug itself.
So once the warm-up is over, open the scan the expected state was built from and go through it step by step:
- do the steps contain the events that belong there, for example
purchaseon the order confirmation step, - do the key parameters have the right type, for example
valueas a number, - do the consent signals match what the visitor chose on the banner at that point.
If something is off, fix the site. The next scan shows the fix as a change, and you write it in with “Mark as correct”. Keep one thing in mind: an event or parameter that was added is written as optional when you approve it, so a later outage of it will not be reported. You get the most out of monitoring when the tagging is right before the first scan.